Have you ever experienced this scenario? You’re in search of a measuring cup, and despite thorough exploration, it seems to have vanished into thin air. You diligently sift through every drawer, only to come up empty-handed.
Surprisingly, even a well-maintained kitchen can succumb to disorderliness. Consider the chaos that ensues during hectic family meal preparations or snack times. It turns out, a seemingly intricate kitchen layout might be more of a hindrance than a help. Ideally, every kitchen item and cooking utensil should have a designated, easily accessible place. However, devising an effective organizational strategy for your kitchen isn’t always a straightforward task.
Let’s delve into each corner of the kitchen, exploring the cutlery drawers, cabinets, and even the fridge. We’ll empty them out and embark on a fresh start with some simple organizational suggestions. These ideas will enable you to maximize your available space, transforming your kitchen into a more orderly and user-friendly space.
1. Conquer Your Kitchen Clutter through Strategic Storage Planning
As you embark on the journey to organize your kitchen cabinets and cupboards, you’ll quickly realize the sheer volume of items concealed from view. However, this task becomes more manageable when approached systematically, one area at a time.
Consider focusing on the following storage spaces:
- Upper cabinets
- Lower cabinets
- Drawers
- Pantry
- Countertop areas
- Standalone shelves
- Island or kitchen cart storage
- Hanging storage
- Fridge
- Freezer
To prevent feeling overwhelmed, select one or two areas to declutter initially before progressing to others. Alternatively, if your kitchen layout dictates, tackle the contents of a specific corner concurrently.
Breaking down this substantial undertaking into smaller, more digestible tasks enhances your ability to concentrate. Moreover, the satisfaction of crossing items off your list will reinforce your sense of achievement.
2. Empty and Assess: The Key to a Fresh Start
Once you’ve chosen your starting point, embark on the process of removing everything from those designated storage spaces. Consider allocating a space on your countertop, dining table, or even a folding card table for these items. This step can also turn into a engaging kitchen activity that kids can participate in.
By creating this clean slate, you open the door to establishing a new and more effective organizational system. Often, when we first move into a kitchen, we hastily assign each item a “home” without revisiting the layout. As you become accustomed to your kitchen, taking the time to reconsider those initial decisions can lead to a more thoughtful and functional arrangement.
3. Refresh with a Thorough Cleaning Session
Once your drawers, cabinets, or refrigerator are completely emptied, it’s time to bring out the disinfecting supplies. Engage in a deep cleaning session for these surfaces. If the nooks and crannies of these storage spaces often escape your regular cleaning routine, now presents an ideal opportunity to eliminate any lingering residue.
Employ a duster or vacuum attachment to reach the elusive crumbs in the corners of drawers, followed by the application of an antibacterial cleaning solution.
Experts recommend undertaking a comprehensive clean of your fridge every 3 to 6 months. Given that it houses the items you consume, including your favorite snacks, periodic sanitization and disinfection of the fridge interior contribute to safer and fresher food storage.
4. Enhance Cleanliness and Organization with Liners
If you haven’t already incorporated them, consider using drawer and shelf liners to maintain the cleanliness of those pristine surfaces. Opt for liners with easy-to-clean surfaces and added grip for an extra layer of protection.
Measure and cut the liner material to fit the specific dimensions of your drawers and shelves. Install them before delving into the task of sorting through the array of kitchen accessories nearby.
5. Streamline with Categorization
Now, take inventory of the items that were removed from the recently sanitized storage spaces. Categorize each item based on frequency of use: those used regularly, occasionally, and those untouched for a year or more.
Create a separate pile for any broken or damaged kitchen tools that are destined for disposal. This categorization process aims to streamline your belongings. The fewer items you retain, the simpler they become to store and access.
6. Strategically Assign Locations
According to Usage Patterns Having pinpointed the utensils and cooking accessories essential for daily use, it’s time to allocate designated spots for them.
Reflect on your kitchen habits. Consider, for instance, the drawer that’s most accessible when you’re standing at the stovetop, and what items you typically search for in that space. This awareness will guide you in creating a more practical and efficient layout in the upcoming phase!
7. Elevate Organization with Kitchen Accessories
Transitioning from a weekend organization project to maintaining long-term tidiness requires a strategic approach. Fortunately, there’s a key to sustaining order, even when life gets hectic.
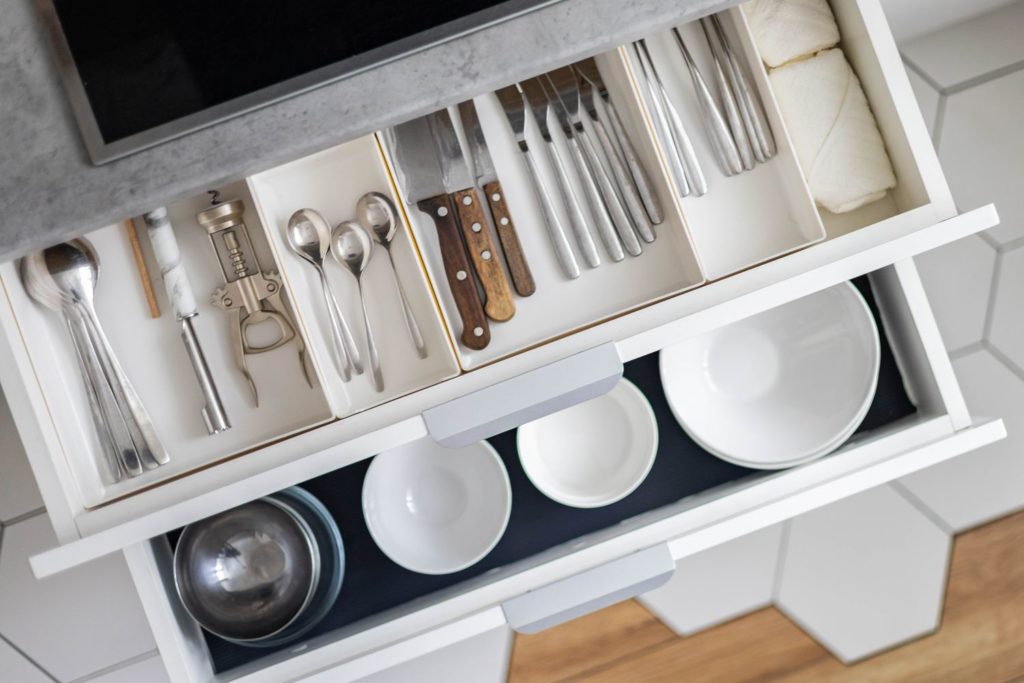
Introduce trays, dividers, and organizers to optimize the functionality of your now-empty storage spaces. The choices are abundant, offering a variety of solutions. Here are a few suggestions to kickstart the process:
- Utilize utensil trays to keep silverware, spoons, and other cooking utensils neatly arranged.
- Incorporate roll-out drawer baskets for easier access to items stored in lower cabinets.
- Enhance tall cabinets with stackable shelf inserts to maximize functionality.
- Employ purpose-built accessories for organizing spice jars and other small items.
- Integrate pull-out trays to keep jars and bottles in the fridge efficiently grouped.
- Utilize vertical organizers for neatly arranging baking sheets, lids, and plates.
These thoughtful additions will not only streamline your organization process but also contribute to the sustained orderliness of your kitchen space.
8. Prioritize Placement of Larger Items
Considering the constraints of your available storage space, you may find yourself somewhat restricted in determining how to organize your kitchen. In situations where options are limited, such as with big mixing bowls that fit only in larger cupboards, it becomes practical to address the placement of larger items first.
Initiate the reorganization process by finding suitable homes for substantial items, including mixing bowls, pots, and other sizeable accessories. This also encompasses those substantial serving trays typically brought out during holiday seasons. Store less frequently used small appliances in harder-to-reach cabinets, optimizing the space for more regularly accessed items. This strategic approach ensures that the larger essentials are accommodated efficiently, paving the way for a more systematic organization of the remaining storage spaces.
9. Utilize Organizers for Smaller Items
To complete the reorganization process, fill in the remaining space with smaller items. Instead of resorting to stacking items in a haphazard manner, leverage organizers and trays creatively. These tools enhance space utilization, ensuring everything remains visible and easily accessible. Minimizing the need for shuffling items when retrieving or putting them back contributes to a more efficient kitchen experience.
10. Reward Yourself with a Well-Earned Break… and Let the Cooking Begin!
With the final touches added to your kitchen, take a moment to reward yourself with a well-deserved break. The satisfaction of achieving a Pinterest-worthy kitchen is something to relish.